GoTime #311 - Ship software, not code
I was live with Natalie to discuss how GOOS and GOARCH spark joy. Go Time 311: Ship software, …

Since v1.12.0-pro, GoReleaser can split and merge its release process.
This means that you can run the builds for each platform in its own machine, and then merge the results and publish later.
This can be useful if you need CGO, or if your build process takes too long.
In this post we’ll set up an example using GitHub Actions and a sample project.
By default, GoReleaser will split by GOOS, so, if you run
goreleaser release --split in a Linux machine, it’ll build all targets where GOOS is Linux.
You might want one worker per actual target, and you do that by adding this to
your .goreleaser.yml:
# goreleaser.yaml
partial:
  by: target
Now, running goreleaser release --split will build only the targets matching
the current GOOS and GOARCH.
Now, we need to set up our pipeline.
Here’s the full .github/workflows/release.yml:
# .github/workflows/release.yml
name: goreleaser

on:
  push:
    tags: ['v*']

permissions:
  contents: write
  id-token: write
  packages: write

jobs:
  prepare:
    strategy:
      matrix:
        GOOS: [linux, windows, darwin]
    runs-on: ubuntu-latest
    steps:
      - uses: actions/checkout@v3
        with:
          fetch-depth: 0
      - uses: actions/setup-go@v3
        with:
          go-version: 1.19
          cache: true
      - shell: bash
        run: echo "sha_short=$(git rev-parse --short HEAD)" >> $GITHUB_ENV
      - id: cache
        uses: actions/cache@v3
        with:
          path: dist/${{ matrix.GOOS }}
          key: ${{ matrix.GOOS }}-${{ env.sha_short }}
      - uses: goreleaser/goreleaser-action@v3
        if: steps.cache.outputs.cache-hit != 'true'
        with:
          distribution: goreleaser-pro
          version: latest
          args: release --clean --split
        env:
          GGOOS: ${{ matrix.GOOS }}
          GITHUB_TOKEN: ${{ secrets.GH_PAT }}
          GORELEASER_KEY: ${{ secrets.GORELEASER_KEY }}
  release:
    runs-on: ubuntu-latest
    needs: prepare
    steps:
      - uses: actions/checkout@v3
        with:
          fetch-depth: 0
      - uses: actions/setup-go@v3
        with:
          go-version: 1.19
          cache: true

      # copy the cashes from prepare
      - shell: bash
        run: echo "sha_short=$(git rev-parse --short HEAD)" >> $GITHUB_ENV
      - uses: actions/cache@v3
        with:
          path: dist/linux
          key: linux-${{ env.sha_short }}
      - uses: actions/cache@v3
        with:
          path: dist/darwin
          key: darwin-${{ env.sha_short }}
      - uses: actions/cache@v3
        with:
          path: dist/windows
          key: windows-${{ env.sha_short }}


      # release
      - uses: goreleaser/goreleaser-action@v3
        with:
          distribution: goreleaser-pro
          version: latest
          args: continue --merge
        env:
          GITHUB_TOKEN: ${{ secrets.GH_PAT }}
          GORELEASER_KEY: ${{ secrets.GORELEASER_KEY }}
This workflow will:
prepare job for linux, windows and darwin
goreleaser release --clean --splitdist/$GOOS, and we copy them to the cache
using the current commit SHA as keyrelease job
dist folders from previous runs into ./distgoreleaser release continue --mergeAnd that should give you this result:
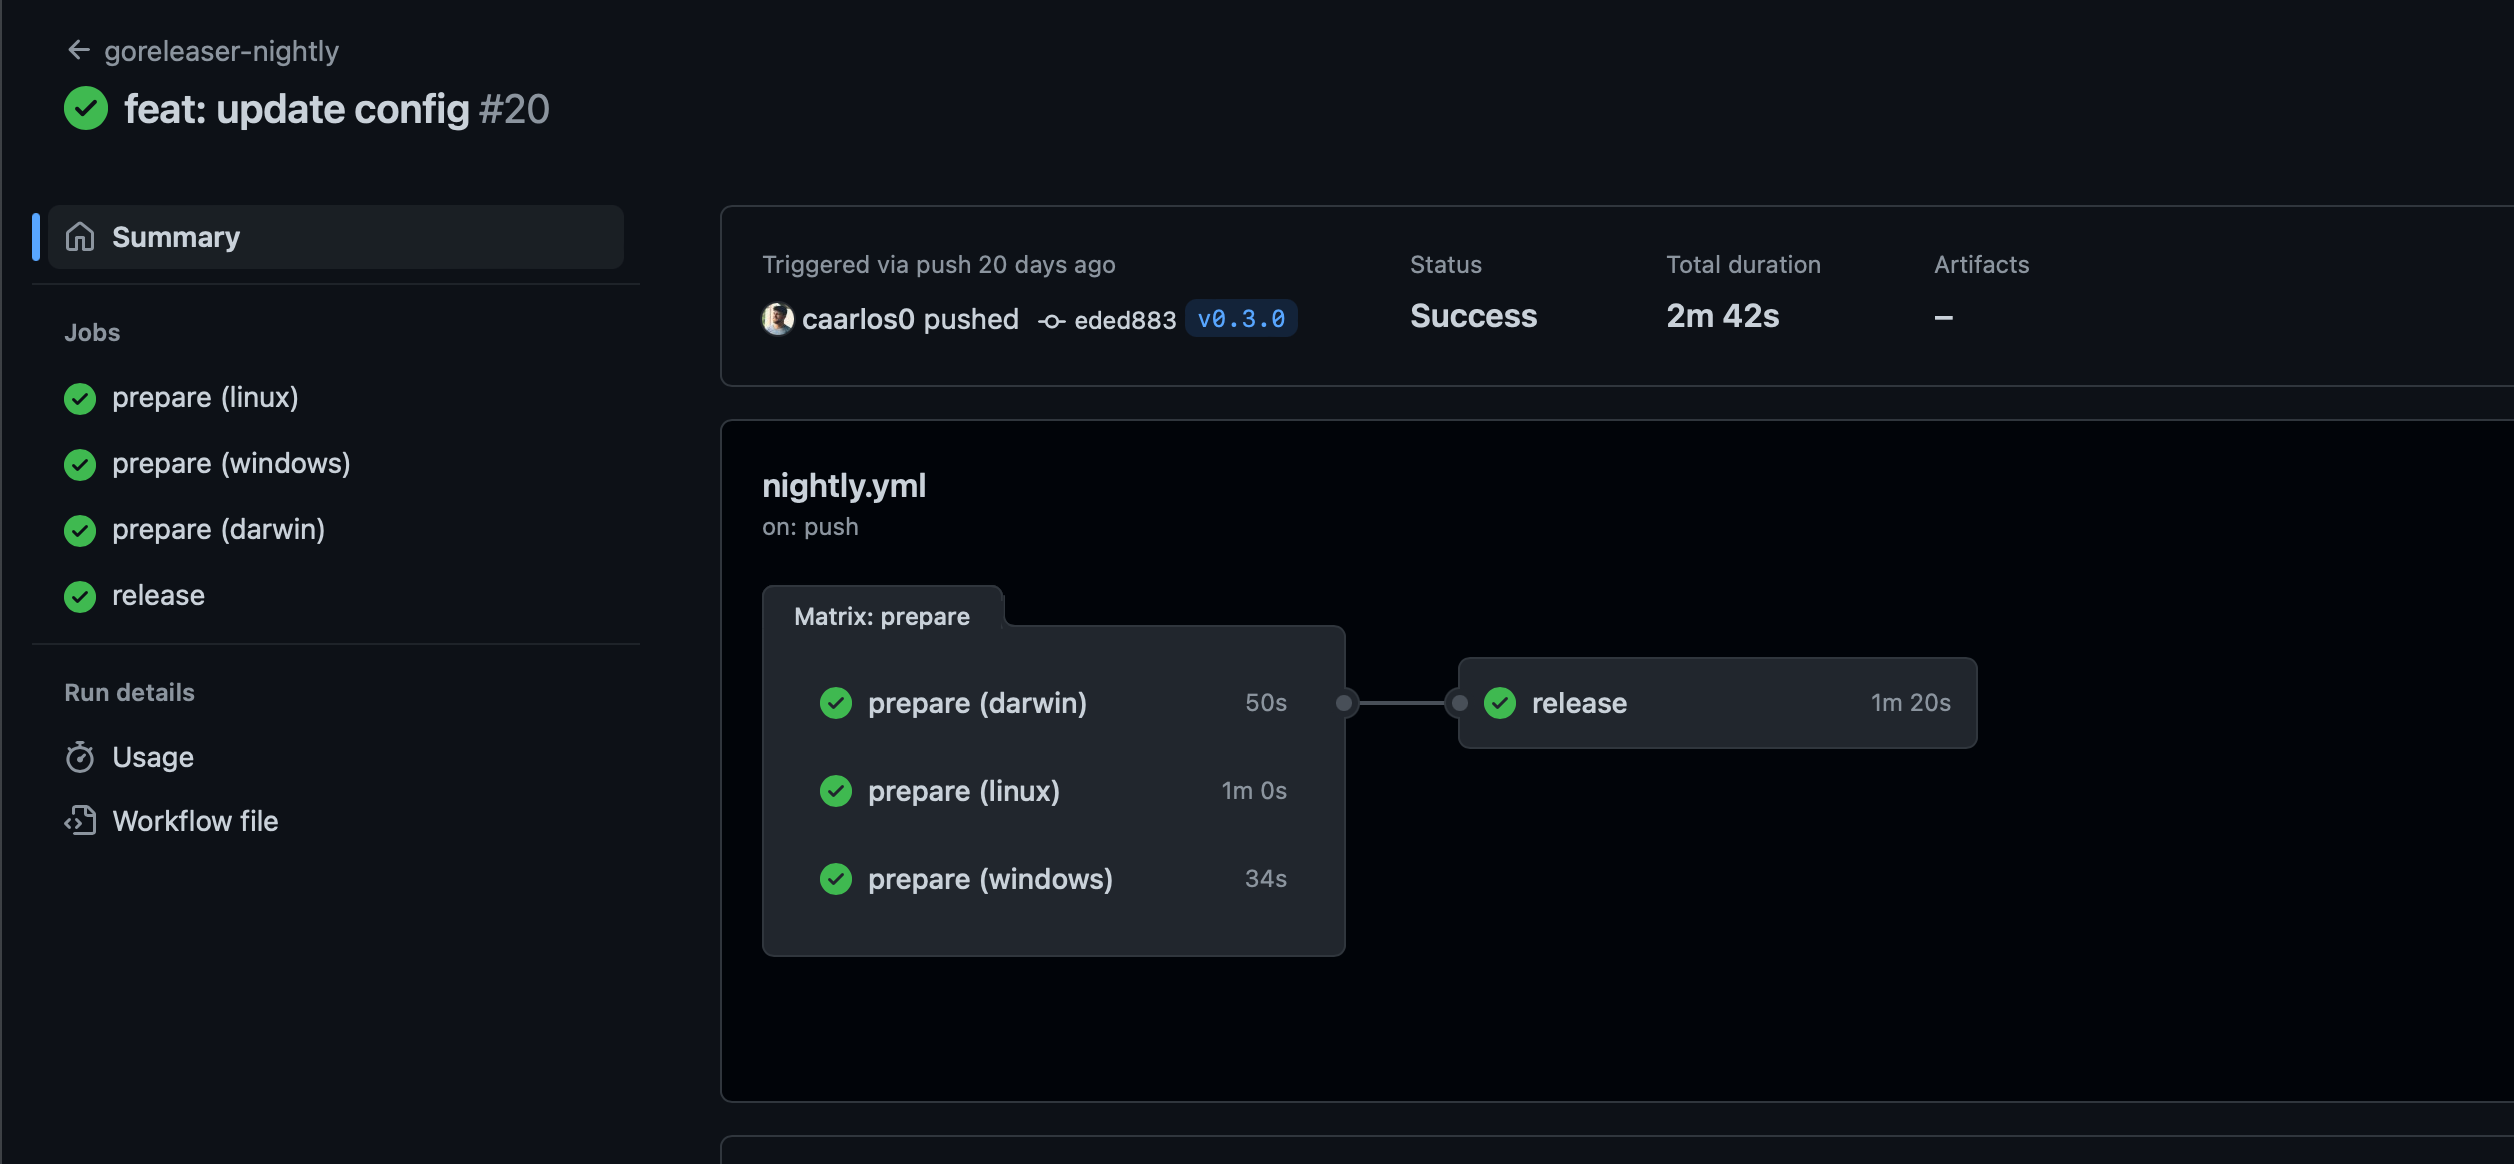
GitHub actions Run workflow
In this example we don’t need CGO, that’s why we run everything on
ubuntu-latest, and pass the GOOS to the goreleaser-action via GGOOS
(GoReleaser GOOS).
If you need CGO, you can change the workflow to use the [ubuntu-latest, macos-latest, windows-latest] as matrix to runs-on, and handle the
translation from that into GOOS when creating the cache folders.
You can find an example for that here.
This is also useful to build Windows Docker images, as they are impossible to build from Linux hosts. You can check a complete example here.
Finally, if you set partial.by=target, you’d need even more configuration.
You can also use it with the new nightlies feature, with Docker and everything else.
If you want to see a full working example, check out this repository. Also worth checking out the documentation.